
Insurance Basics – Filing a Claim for Winter Storm Roof Damage
- shieldandshelterro
- Dec 31
- 6 min read

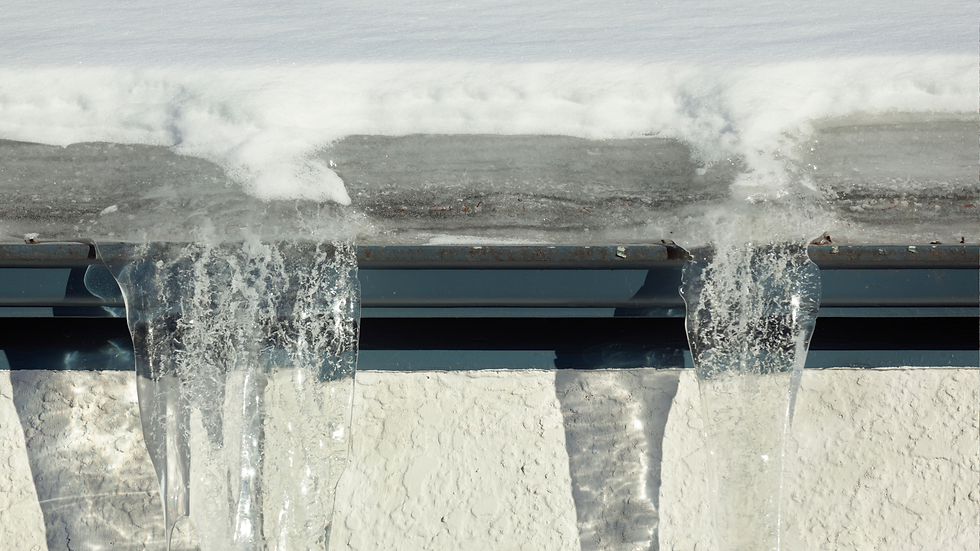
When a winter storm hits Texas, most people are thinking about pipes, power, and staying warm. But once the ice melts and the roads clear, another problem often shows up: roof damage.
Freezing rain, ice, wind, and falling tree limbs can all beat up your roof. Some damage is obvious—missing shingles, broken gutters, water dripping from the ceiling. Other damage is sneaky and doesn’t show up until weeks later as a stain, a musty smell, or a “soft spot” in the attic.
If a storm has chewed up your roof, there’s a good chance you’ll end up dealing with your homeowners insurance. That can feel overwhelming, especially if you’ve never filed a claim before.
This guide breaks down the basics of filing a claim for winter storm roof damage—step by step, in plain language.
How Winter Storms Damage Roofs
Winter storms in Texas usually bring a mix of:
Freezing rain and ice – Ice adds weight, can form ridges along your roof edge, and can work its way under shingles and flashing.
Strong winds – Winter fronts can rip shingles off, crease them, or loosen flashing and ridge caps.
Falling limbs and debris – Ice buildup on trees can cause branches to snap and hit your roof, gutters, or vents.
Freeze–thaw cycles – Water gets into tiny cracks, freezes, expands, and makes small problems bigger.
You might notice:
Missing or crooked shingles
Shingle granules piling up in gutters
Bent or hanging gutters
Damp spots on ceilings or walls
Drips, leaks, or musty smells in the attic
Even if everything looks okay from the ground, it’s common for storm damage to be hiding where you can’t see it.
Step 1: Stay Safe and Document the Storm
Your first job after any storm is staying safe, not climbing on a slick roof.
Right after the storm:
Don’t walk on an icy or snow-covered roof.
Stay clear of big, ice-loaded branches.
If water is dripping inside, move furniture and put out buckets or towels to protect your home.
Once things calm down a bit, start documenting:
Write down the date and time of the storm.
Take photos or short videos of:
Ice or snow on your roof and yard
Any downed limbs or debris
Visible damage to shingles, gutters, or siding (from the ground)
Interior damage like ceiling stains, peeling paint, or wet flooring
This doesn’t have to be fancy. Your phone photos are often enough to help your roofer and your insurance company see what happened.
Step 2: Get a Professional Roof Inspection
Before you ever call your insurance company, it’s smart to know whether you have real storm damage or just normal aging.
A good roofing contractor can:
Safely get on the roof and check for:
Missing, cracked, or creased shingles
Impact marks from ice or debris
Damaged ridge caps
Loose or bent flashing
Inspect gutters, downspouts, and fascia
Look in your attic for:
Wet insulation
Dark stains on the wood
Active drips or water trails
At the end, they should be able to tell you:
Whether there’s winter storm damage
How serious it is
Whether it’s likely to meet or exceed your deductible
Whether you’re looking at repairs, a partial replacement, or a full replacement
This step keeps you from wasting a claim on wear-and-tear or minor issues that don’t justify going through insurance.
Step 3: Take a Quick Look at Your Policy
You don’t have to read every line, but it helps to know the basics before you file.
Look for:
What’s covered – Make sure wind, ice, and falling objects are covered causes of loss.
Your deductible – This is what you pay out of pocket before insurance kicks in (could be a flat amount or a percentage).
Roof limitations – Some policies reduce coverage for very old roofs or have special rules for cosmetic vs. functional damage.
Deadlines – There may be time limits for reporting storm damage.
You don’t need to be an expert—that’s what your agent is for—but having a rough idea of your coverage helps you ask better questions.
Step 4: Call Your Insurance Company to Start the Claim
If your roofer confirms storm damage and it looks like more than your deductible, it’s time to call your insurance company.
When you call:
Have your policy number ready.
Give the date of the storm and a simple description: ice, wind, falling branches, leaks, etc.
Mention if you currently have active leaks, interior damage, or safety concerns.
Let them know a roofer has inspected the roof and found damage (if that’s already happened).
They’ll usually:
Assign a claim number
Schedule an adjuster to visit your property
Explain the basic next steps and timelines
Write down who you spoke with, when, and what was said. It helps if things get confusing later.
Step 5: Meet the Adjuster (Bring Your Roofer if You Can)
An insurance adjuster will come out to inspect your roof and verify the damage. This is where having a roofer involved is very helpful.
Your roofing contractor can:
Point out specific areas of winter storm damage
Explain how ice, wind, or debris caused what they’re seeing
Make sure all damaged areas (roof, gutters, vents, sometimes interior) are looked at
Help answer technical questions about what needs to be repaired or replaced
You are allowed to have someone on your side there. It often leads to a more accurate scope of work.
Step 6: Review the Estimate From Your Insurance Company
After the adjuster’s visit, you’ll get a written estimate. This may be called a scope of loss.
Look it over:
Does it list all the damaged areas you know about?
Are the measurements (roof size, number of slopes, vents, etc.) reasonable?
Is the work described as:
Small repairs?
Partial replacement?
Full roof replacement?
Does it include related items, like:
Damaged gutters
Vent caps
Interior ceiling repairs, if applicable
Share that estimate with your roofer. They can compare it to what they found and tell you if anything is missing or needs to be discussed with the adjuster.
Step 7: Choose a Contractor You Trust
You are almost always free to choose your own roofer. You do not have to use whoever knocked on your door the day after the storm.
Look for:
A local, established company (not just a storm chaser passing through)
Proof of insurance and references
Clear, written proposals that match or explain any differences from the insurance estimate
Good communication and no high-pressure tactics
Your insurance company is paying to restore your home to its pre-storm condition. Your job is to pick someone who will actually do that properly.
Step 8: Know What You’ll Pay Out of Pocket
Even with a claim, you’ll likely have some costs:
Deductible – This is almost always your responsibility.
Upgrades – If you choose better materials (like impact-resistant shingles), you may pay the difference between what insurance pays and the upgraded cost.
Non-covered items – Anything the insurance company specifically excluded, but you still want done.
A good roofer will walk you through:
What insurance is paying
What counts as an upgrade
What your approximate final out-of-pocket cost will be
No surprises is the goal.
Step 9: Get the Work Done and Keep Your Paperwork
Once everything is approved:
Schedule the work as soon as weather allows.
Keep copies of:
The insurance estimate
Your roofing contract
Any change orders
Final invoices
Some policies pay part of the claim up front, then release the rest (depreciation) after the work is completed and you send in final invoices. If that’s the case, your roofer can help provide whatever documentation is needed.
Common Mistakes to Avoid
A few things that can cause headaches:
Waiting too long to report damage or get an inspection
Making permanent repairs before insurance has a chance to inspect (small emergency patches are usually fine—keep receipts)
Ignoring “small” stains or drips, hoping they’ll go away
Signing anything with a contractor you don’t know or trust
Being afraid to ask questions if you don’t understand part of the process
You don’t have to know everything about insurance—but you do want to understand the basics of what’s happening with your home and policy.
When in Doubt, Get a Local Pro In Your Corner
Winter storm roof damage can be confusing. Is it really storm-related? Is it wear and tear? Is it worth filing a claim? Are they going to pay for a whole roof or just a patch?
You don’t have to figure all of that out alone.
A good local roofing company can:
Check your roof and attic for real winter storm damage
Take photos and help you document what’s going on
Explain what’s likely to be covered (and what probably isn’t)
Meet the adjuster with you
Restore your roof the right way—not just the cheapest way
Need Help After a Winter Storm?
If a winter storm has rolled through and you’re worried about your roof, Shield & Shelter Roofing is here to help.
We offer:
Free inspections after winter storms
Photos and clear explanations of any damage we find
Help understanding your options for repairs, replacement, and insurance
Quality work designed not just to fix your roof, but upgrade it when possible
Serving Stephenville, Granbury, Tolar, Dublin, Hico, Bluff Dale, Glen Rose, Weatherford, Brownwood, Waco, Fort Worth, Comanche, Hamilton, Cleburne, Temple–Killeen, and surrounding Central Texas areas.
Call today to schedule a winter storm roof inspection:(254) 300-8728
Shield & Shelter Roofing — We don’t just fix roofs. We help you protect what matters most.


Comments